

Let’s start this off with the obvious statement you’ve heard 100 times by now - video conferencing has become a staple of how business is done, and it’s not going anywhere. Like it or not, it’s very convenient and cost-effective, and larger businesses aren’t going to make much of an effort to uproot their employees anytime soon. Even here in Bentonville, it’s becoming commonplace (or even the default) to “have a Zoom”, instead of meeting in person for coffee.
As we watch our best-practices of a firm handshake and attentive body language continue to sit idle in the corner, we might as well make the most of it, and that means maximizing on this low-hanging video content fruit and turning it into social gold.
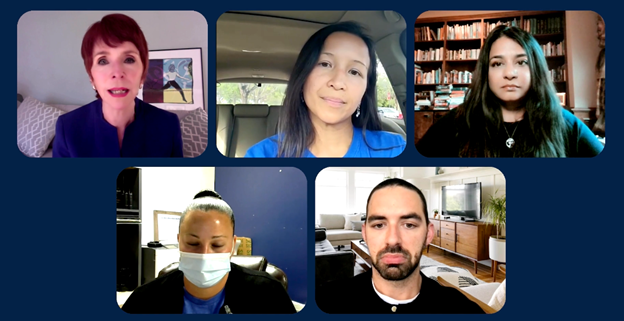
At Green Yonder, we’ve been tasked with completely virtualizing major events, playing back an entirely pre-recorded meeting at a designated time for participants to tune into, just like a holiday special on NBC. Keynotes, panels, hosts - they are all recorded via Zoom and reconfigured in an easy-to-digest 1–2-hour chunk of content that associates can view from the pleasure of their couch. Or patio. Or wherever.
However, sometimes you just need to record a simple Zoom call and post it back up for the sake of social media or training. No fancy introductions, no additional graphics, just the core content. Maybe it’s an interview with an employee that you’d like to show the rest of your team. Maybe it’s a testimonial about your product. Whatever it might be, you need to record it, download it locally, then upload it onto the video viewing platform of your choice (we’re big fans of Vimeo.com, but that’s another blog).
There are two ways to accomplish this - the easy way and the hard way. Let’s start with the easy way.
Recording Inside of Zoom
By now, you’re probably saying “Hey partner, I can press that little record button just as easily as the next cow-poke, so you just mosey on.” I’m not sure why you suddenly became an aggressive Zoom-savvy cowboy, but you’re right! Zoom has built in recording capabilities right there in the platform.

There are two types of internal recording that can happen - recording the “Speaker” view, or “Gallery” view. Since Zoom’s internal recording has the resolution of a late-90’s YouTube music video, I would highly recommend using the “Speaker” view. Otherwise, you’ll be stuck with a bunch of little faces all next to each other that are constantly changing position.
You also have the option of recording locally on your computer or tablet. I generally like to record locally if I’m going this route, because I trust my computer to not poo-out and keep the file safe when it’s all said and done. If you’re recording on a machine that might not be as trustworthy, I’d advise just recording up to the cloud and pull the file down after the fact.
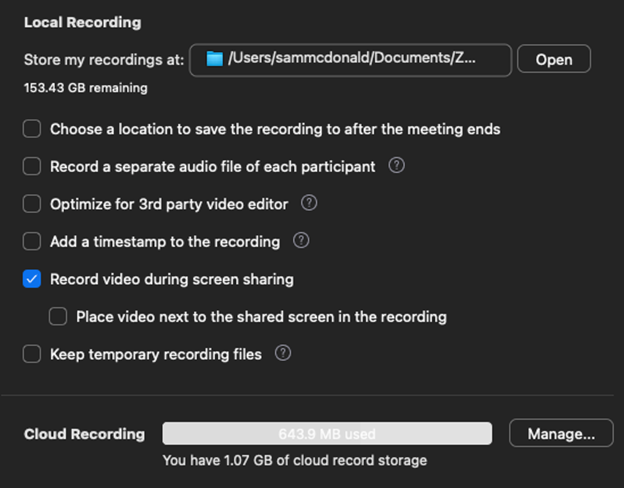
However, if you work for certain companies that have heightened security protocols, you might find that you’re not able to record locally, and if you record to the cloud you’re not able to easily access those files after the meeting. That means we need to get a little tricky.
Using an External Recorder
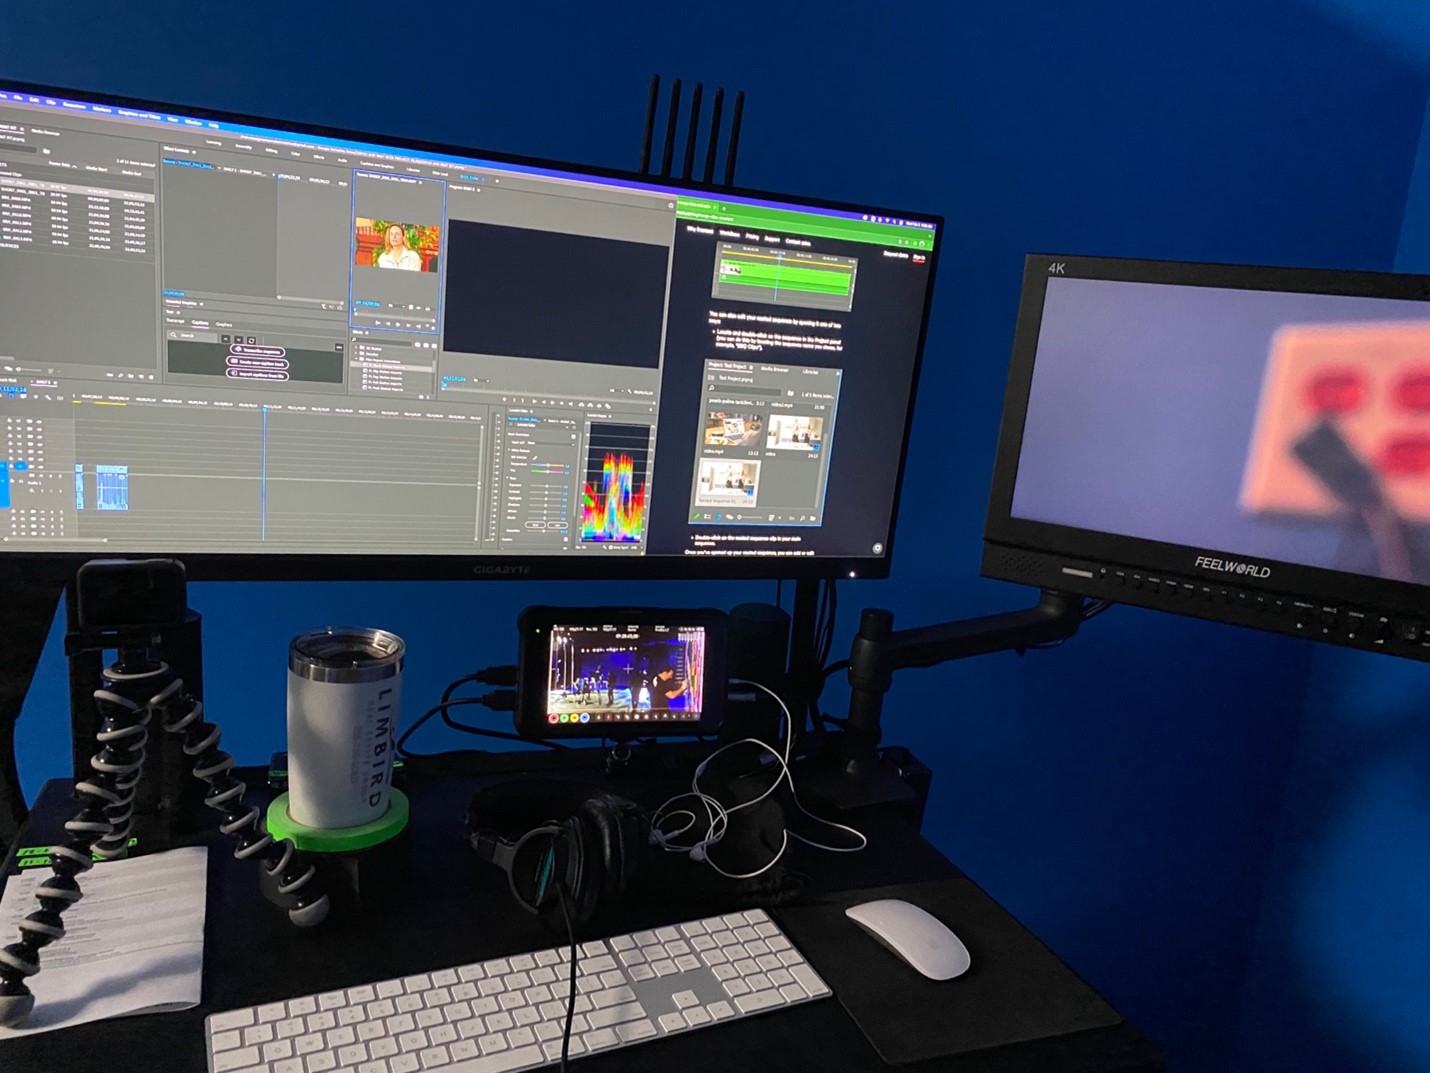
I’m going to let you in on the process that every major content creation firm is using to make this happen, and while it’s an extremely basic concept, it’s far easier said than done without special equipment.
Simply take the audio and video from Zoom and send it to an external recorder. This is a simple as running that HDMI cable to a recorder, then going out from there to your external monitor. With a little practice and some simple hardware, even a non-tech-savvy person can pull this off.
These recorders are only a few hundred dollars on B&H and going about it this way means that when the recording is complete, you’ll have a higher resolution video file that you control from top to bottom. Several recorders even use fan-favorite SD cards to transfer the footage back and forth from your computer.
Once you have your video file recorded, just use a simple video editing software to chop off the ends and upload.
This process is essentially what we do here at Green Yonder, only we use a lot of computers and a much higher resolution. Then, we use a detailed process to sync these recordings together and make it an easy and fun to watch chunk of content.
Are you recording a more complicated piece of Zoom content, such as a panel of experts? Give us a call – I’ll bet we can help.
